A student visa is required for non-citizens who wish to attend a school in the United States. You should begin making preparations at least three to five months before your course is scheduled to begin in order to ensure a smooth application procedure for your US student visa. A US student visa application often consists of many phases. Because these procedures differ at each US consulate or embassy, you should check the website of the one you choose to apply to for specific details.
When applying for a student visa to study in the United States, prospective students will typically go through the following five stages:
- Apply to and be accepted by a school in the United States that is approved by the Student and Exchange Visitor Program (SEVP) (six to twelve months prior to student’s arrival in the United States);
- You are required to pay the cost for the Student and Exchange Visitor Information System (SEVIS);
- Apply for a student visa to the United States of America and include a current photo or photos;
- Fee for the visa application must be paid;
- Make an appointment for a visa interview and show up.
1. Apply to an SEVP-approved institution
Make sure the school and program you pick are accredited by the Student and Exchange Visitor Program (SEVP) of the United States government if you are an international student.
International recognition of your degree by other educational institutions, professional organizations, businesses, and government agencies is dependent on your degree’s level of accreditation. You cannot apply for a US student visa or enroll in the Student and Exchange Visitor Information System (SEVIS) unless your school is recognized by the Student and Exchange Visitor Program (SEVP). You may find approved colleges by visiting the Study in the States website, which is run by the government.
It is necessary to submit individual applications to all of the schools that interest you in the United States since, unlike in other countries, there is no centralised procedure for applying to universities. You should be prepared to show evidence of adequate financial means in addition to meeting the admissions standards of each school.
Universities will register you in the SEVIS system once you’ve been approved. If you’re eligible for a F or M visa, or a J visa, SEVIS will create a document called Form I-20. If you’re eligible for a J visa, SEVIS will generate a document called Form DS-2019.
The SEVP oversees foreign students on F and M visas, whilst the DoS is in charge of Exchange Visitor Programmes and foreign students on J visas. The Department of State and the Student Exchange Programme both make use of SEVIS to keep tabs on schools, EVPs, and overseas students.
2. Pay the SEVIS fee
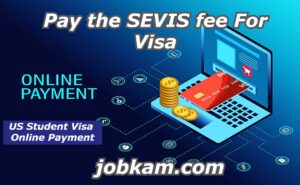
The SEVIS fee needs to be paid at least three days before the US visa application is due. You can pay the charge by submitting a paper form or an online one. You may get both of them by going to the SEVP website of the United States Immigration and Customs Enforcement. Before you submit your I-20 or DS-2019, double-check that all of the data are correct.
The current I-901 charge for F/M visa holders is $200 USD, while the price for J student visa holders is $180 USD. Instead, those on J visas who work as camp counsellors, au pairs, or participate in summer work/travel pay $35. Various payment methods, such as debit/credit cards, checks, foreign money orders, and Western Union Quick Pay, are detailed on the website. Once you’ve paid, you have the option to return to the website and see where your money stands. It is also possible to have someone else pay the charge, like your sponsor. A receipt should be sent to you by the third party that paid the charge on your behalf.
After your payment has been processed, you will be able to see and print a confirmation of your purchase from the website. The US student visa interview requires this confirmation as evidence of payment. If you ever modify your non-immigrant status or seek for any other US immigration benefits, you may also be asked to provide the confirmation to the customs officer at the US port of entry that you have chosen.
3. Complete a US student visa application
You can schedule a meeting with the US consulate or embassy in your nation to apply for a US student visa once you have gotten your SEVIS form and paid the SEVIS fee. Because of the wide variety in visa processing periods, it is recommended that you apply well in advance of the commencement of your programme. Up to 120 days before to your scheduled arrival in the United States, your visa can be obtained.
You may view the main page of most nations’ websites that are specifically designed to assist with US student visa applications here. Even if your nation isn’t on the list, you may still use the US embassy’s website to locate the consulate or embassy in your country.
Online visa application: DS-160
The DS-160 online visa application must be filled out in its entirety in every instance. Before you can begin filling out the application, you must decide where you would want to submit it and gather all of the necessary information and documentation. The form pages will load when you choose and answer a security question. You can see your application ID up top. If you need to leave the application and come back to it later, you may retrieve your form using this ID.
In order to fill out the DS-160 form, you must provide the following personal details:
- Full name and birthdate
- Location and contact information
- Details of a passport
- Information on destinations, routes, and passengers
- History of travel to the United States
- United States-based contact person for you
- Information about one’s family, place of employment, and schools attended
- Confidential, personal, and health records
- A valid SEVIS ID and the mailing address of the US institution or programme in which you wish to enrol (as shown on the I-20 or DS-2019 form)
Additionally, please ensure that you upload a current, appropriate photo of yourself following the guidelines provided for the photo. To ensure you are prepared for your visa interview, you must have a printed photo that satisfies the criteria in the event that your photo upload fails.
If you make a mistake, you may have to reschedule your visa interview, so be careful to answer all the questions completely and precisely. The application process might be complicated, so if you have any questions, you can look up answers on the travel.state.gov website.
Please remember to click the “Sign Application” option at the conclusion of the visa application form to electronically sign your DS-160 once you have finished filling it out. You must print off the confirmation document that includes a barcode, barcode number, and your application ID once your application is uploaded. This page must be brought with you to your visa interview appointment. The entire application does not need to be printed.
4. Pay the visa application fee
A visa application fee is sometimes referred to as the MRV charge, which stands for Machine Readable Visa. Because different embassies and consulates use different payment methods, it is important to check their websites for specific information on how to pay fees. There are three main methods to pay the visa application cost, which is non-refundable and non-transferable:
- Visiting a designated bank branch
- Get a fee confirmation number over the phone.
- Online (receipt printing is required)
You won’t need to worry about the “visa issuance fee based on reciprocity” for F1, F2, M1, M2, J1, and J2 visa applicants if you come across the word throughout your study.
At the time of your visa interview, you will be requested to present the receipt for the MRV cost. Federally sponsored educational and cultural exchange programmes with serial numbers beginning with G-1, G-2, G-3, or G-7, as well as programmes run by the United States Agency for International Development (USAID), exclude some J visa applicants from paying the application processing fee.
5. Schedule and attend a US student visa interview
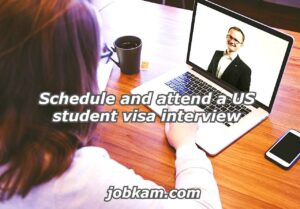
Arranging and attending a visa interview is the last step in obtaining a student visa for the United States. You have the option to do this online or by contacting the US embassy or consulate in your area. In any scenario, before anything else, make sure you pay the MRV charge. You could be asked to provide your MRV fee number.
Meeting with a consular official for an interview is a necessary step in applying for a visa. It’s quite acceptable if the US embassy or consulate where you applied for your visa is different from the one where you will be interviewed. You may access your information at any US embassy or consulate using the barcode on your DS-160. While applying for a visa from a location other than your permanent home, you should be aware that your chances of approval may be lower. Visa interview appointment wait times might differ depending on factors such as location, season, and visa category.
Documents for the visa interview
Make sure you have all the necessary paperwork for your interview by checking the website of the embassy or consulate where you will be applying. Some examples of such documents are:
- Have a passport that is valid for at least six months more than your stay in the US. A separate application is required for each individual requiring a visa if your passport has more than one name. Additionally, be sure you have both your current and previous passports on hand.
- Forms I-20 or DS-2019 from the SEVIS that have been signed (including individual forms for spouses and children)
- The DS-7002 form is only for those who are applying for a J-1 Trainee or Intern visa.
- receipt of the SEVIS charge
- The confirmation page for the DS-160 application, which includes a barcode and the application ID number
- confirmation receipt for the payment of the MRV charge
- Please include a printed copy of the visa interview appointment letter
- one to two pictures in the format specified in the criteria for images. The paper used for printing must to be of picture grade.
The following papers should also be available from you:
- Official documents attesting to enrollment at various schools
- Results from standardised exams recognised by the school, such the TOEFL, LSAT, GRE, GMAT, etc.
- Proof of adequate means to pay educational costs, transportation costs, and living expenses while you are a student in the United States, either from you or your sponsor (either your parents or the government).
A separate written record of all your prior workplaces and educational institutions you have attended might also be brought over for reference.
In order to apply for a derivative visa, you must:
- Documentation of relationship, such as a marriage licence or birth certificate
- The primary applicant’s visa (F-1, M-1, or J-1) or formal USCIS documents verifying their status is required.
- The passport page containing the principal applicant’s personal information, photographed and saved.